Packaging the installable cloud app
After configuring the PowerServer project properly, you can build
and package the installable cloud app (including the client app, cloud app
launcher, PowerBuilder runtime files, and PowerServer Web APIs) into an
executable installer or a zipped file.
To package the installable cloud app:
-
Go to the PowerServer project painter > Deploy page > Basic tab.
-
Select External as the target
run mode, and then select Folder as
the target server. -
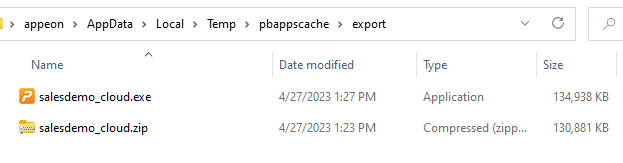
Specify to generate the package as an executable installer or
a compressed zip file.-
If Zipped file is
selected, an appname.zip file is generated
in the specified path. You can copy the zip file to the server
and then decompress it to the web root. -
If Executable installer
is selected, an appname_Installer.exe file
is generated in the specified path. You can copy the executable
file to the server and then run it to install the application to
the web root.
-
-
Specify how to package the PowerServer Web APIs.
-
Framework-dependent or
Self-contained — A
Self-Contained package will not only include the app assembly
files and its dependencies, but also include the .NET Core
runtime and libraries. Users can run it on a machine that has no
.NET Core runtime installed. A Framework-Dependent package will
only include the app assembly files and its dependencies. Users
have to install the .NET Core runtime in order to run the
app. -
Portable, Windows 64-bit, Linux 64-bit, or Windows 32-bit — The target platform
that the Web APIs is published for. If you know the architecture
of the target server, you can select the corresponding platform;
if you are not sure of the server architecture, you can select
Portable. But if you select
Portable, you can only select
Framework-dependent.Note
Make sure the platform of Web APIs matches with that of
the server. Take IIS for example, if you select Windows 32-bit, make sure IIS is 32-bit
(set “Enable 32-Bit Applications” to True); if you select
Windows 64-bit, make sure IIS
is 64-bit (set “Enable 32-Bit Applications” to False). For
more, refer to this
section. -
Web API site URL — If
you know where the Web APIs will be running, you can specify the
URL here; if you are not sure where the Web APIs will be
running, you can leave this field empty and specify the URL
later in the client app > apprun.json.
-
-
Specify the folder and file name where the package will be
generated. You can select to delete all existing files in the zip
file before packaging.
-
Save the project settings.
-
Click the Build & Deploy
Project button ( ) on the toolbar to compile the project and
generate the package.When the build & deploy process completes successfully,
the package should be generated in the output path.