Packaging and copying the client app
This section will walk you through packaging and copying the
client app to the web root of the IIS web site.
Before you take the steps below to package the client app, make
sure you have built the application successfully by following
instructions in Tutorial 1 > “Task 4: Setting up the
development PC“.
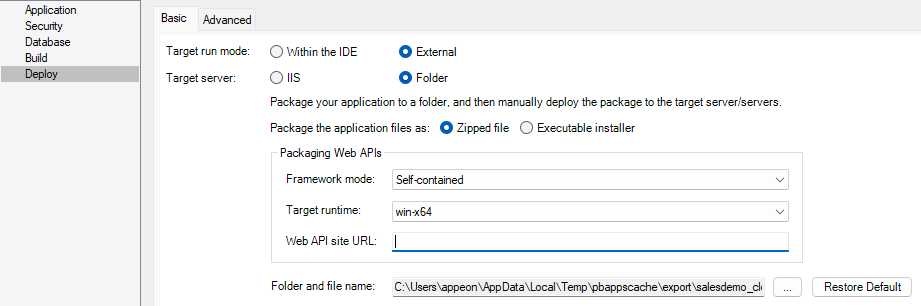
Step 1: In the PowerServer project painter > Deploy page > Basic tab, select External as the target run mode, and then select
Folder as the target server.
Step 2: Specify to generate the package as a Zipped file.
Step 3: If you want the package to include the Web APIs as well,
you should also specify the following settings: Framework mode, Target
runtime (this must match with the architecture of the server where the
Web APIs will be running), and the Web API site URL (if you know where
the Web APIs will be running).
Step 4: Specify the location where the package will be
generated.
Step 5: Save the project settings and then click the Build & Deploy Project button in the toolbar
to generate the package.
When the packaging process is completed, the folder that contains
the generated files will be displayed.
Step 6: Extract the generated zipped file and copy the
“CloudAppPublisher” and “[appname]” folders to the web root of the IIS
web site.
The “CloudAppPublisher” contains the cloud app launcher and the
runtime files; the “[appname]” folder (for example “salesdemo_cloud”)
contains the application files.

Step 7: Open the apprun.json
file from the “[appname]” folder and make sure the launcher URL, Web API
URL, and runtime URL are correct.
After that you should be able to access the application by
inputting the application URL in the Web browser:
http://[ServerIP]/[AppName].