Make
cosmetic changes to the first DataWindow object
Where you are
Create and preview
a new DataWindow object
> Make cosmetic
changes to the first DataWindow object
Create a second
DataWindow object
Make cosmetic changes to
the second DataWindow object
Now you can make cosmetic changes to the DataWindow. You reposition
the columns and column headings to make room for the hand pointer, which
displays to the left of the currently selected row. You also move some of
the columns to make them line up with their headings.
You make these changes in the Design view. You can keep the Preview
view open at the same time to see how the changes you make affect the
appearance of the DataWindow at runtime.
-
Select Edit>Select>Select All from the menu bar
or
Press Ctrl+A.
All of the controls in the DataWindow object are selected in the
Design view. -
Position the mouse pointer over one of the selected
objects.Drag the object to the right about one inch.
All of the selected objects move together.
-
Click in a blank area in the Design view.
You clear the object selection.
-
Click the Customer ID header above the Header band.
Hold down the Ctrl key and click the id column above the Detail
band.Release the Ctrl key and drag the id column to the left about
one-half inch.The column and its header move together.
-
Click the Center button (
 ) in the StyleBar.
 -
Click in a blank area in the Design view.
This centers the Customer ID column header text and the column
data. -
Click the First Name header.
-
Hold down the Ctrl key and click the Last Name and Company Name
headers. -
Click the Left button (
 ) in the StyleBar.
 When you have finished, the Design view should look something
like this: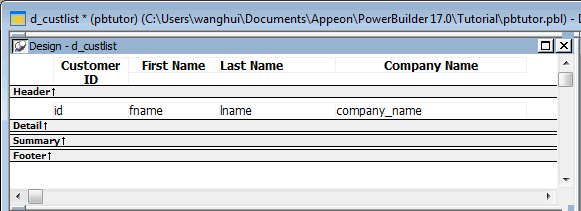
-
Select File>Close from the menu bar.
A message box asks if you want to save your changes.
-
Click Yes.
PowerBuilder saves the DataWindow object and closes the
DataWindow painter.