Installing IIS in Windows Server 2019
Let’s now install IIS on this machine.
Note
Be aware of the following when hosting the application under
IIS:
-
Do not use any website that is already hosting
applications or pages for hosting the client app or Web APIs. It
is highly recommended that you create a new site for hosting
client app and Web APIs.A common issue with the existing website is the default
configuration of IIS may have been changed, for example,-
If the “Enable 32-Bit
Applications” option is set to True, then IIS
worker process will run as a 32-bit app and it will fail to
work with the 64-bit Web APIs and 64-bit database; if
“Enable 32-Bit
Applications” is set to False, then IIS worker
process will run as a 64-bit app and it will fail to work
with the 32-bit Web APIs and 32-bit database.For more, refer to “HTTP Error
500.32 – Failed to load .NET Core host” error in
Troubleshooting Guide. -
If the “CGI-exe”
handler is enabled (it is disabled by default), IIS will
fail to download the executable installer of Cloud App
Launcher.For how to disable the CGI-exe handler, refer to “HTTP Error 404.2 – Not
Found” or “HTTP Error 502.2 – Bad Gateway” error in
Troubleshooting Guide. -
If the file extension (such as .json) is removed from
the MIME type list in IIS, the corresponding static files
(such as LauncherSetup.json, apprun.json etc.) cannot be
accessed from IIS.For how to add the file extensions, refer to Failed to access
the *.json file in Troubleshooting Guide.
-
-
If you have multiple Web APIs, you can deploy each Web
APIs to a different web site or deploy multiple Web APIs to the
same web site.For new users or those who are setting up a test or
development environment, deploying each Web APIs to a separate
web site is recommended, because it is easier to configure and
succeed.For experienced users or those who are setting up a
production environment, deploying multiple Web APIs to the same
web site is recommended, because it is easier to manage multiple
Web APIs, but you will have to convert the API folder to an IIS
sub-application first (see Deploying multiple apps to one
site). -
If you have multiple client apps, you can deploy multiple
client apps to the same web site (and there is no need to
convert the client app folder to IIS application). You can also
deploy the client app to a file server. For more information,
refer to Tutorial: Hosting
the client app in a file server.
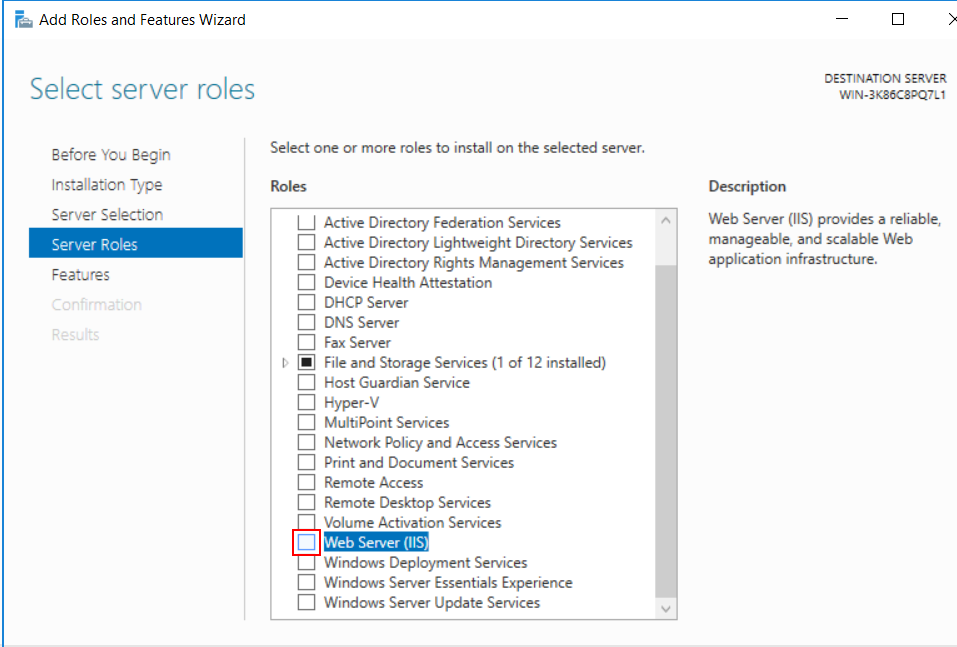
Step 1: In Windows Server 2019, open Server Manager, and then select Add roles and features.

Step 2: In the Add Roles and Features
Wizard, click Next several
times until the Server Roles section
displays; then select the check box of Web
Server (IIS).
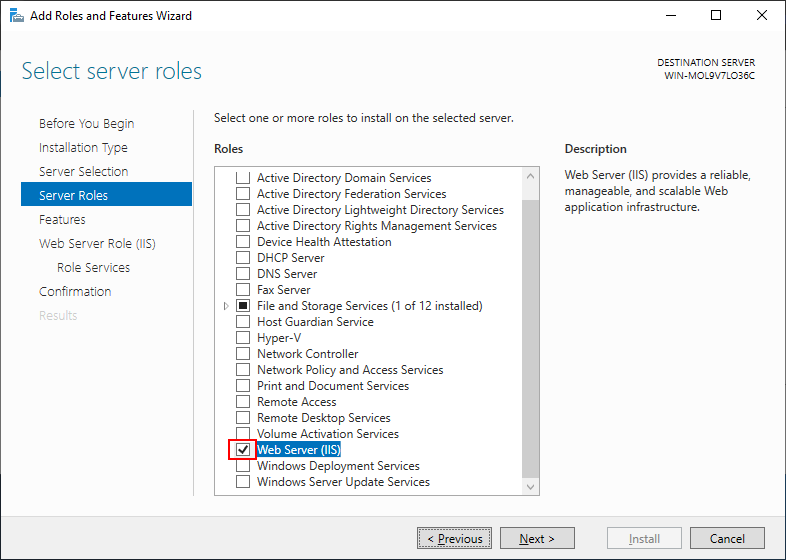
Step 3: Click Add Features when
asked whether to add features required for web server.

Step 4: Make sure the Web Server
(IIS) check box is selected, and click Next.
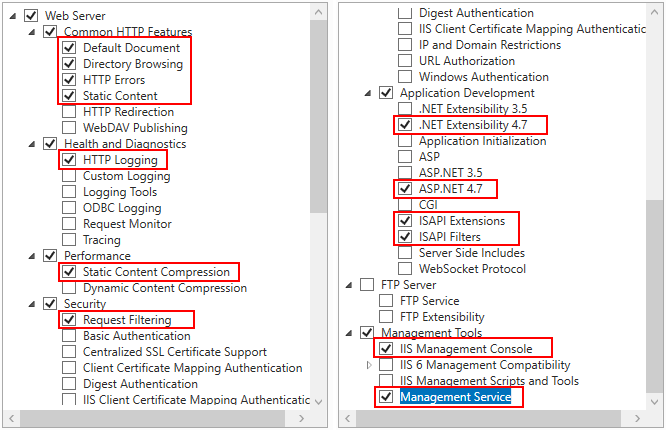
Step 5: Click Next several
times until the Role Services section
displays. Make sure the following role services are selected.
Step 6: Click Next and then
click Install.
After IIS is installed, a Default Web
Site (using port 80) is automatically created.
Step 7: Open a Web browser and run the URL of the Default Web Site.
For example, http://172.16.100.35:80/
The server IP used in this guide is 172.16.100.35. You should
replace it with the IP address of your own server.
If the IIS welcome screen displays, IIS and the default web site
are working properly.