Defining an executable app project
The Project painter for executable applications allows you to
streamline the generation of executable files and dynamic libraries.
When you build a project object, you specify the following components
of your application:
-
Executable file name
-
Which of the libraries you want to distribute as dynamic
libraries -
Which PowerBuilder resource files (if any) should be used to
build the executable file and the dynamic libraries -
Which build options you want to use in your project
-
Which code generation options you want to use
-
Version information for your application
If you do not use the Template Application Target wizard to
create a new application project, you need to define the project using
a Project wizard or by setting project properties in the Project
painter. After you have created a project, you might need to update it
later because your library list has changed or you want to change your
compilation options.
To define or modify an executable application project
-
Select the Application project icon on the Project tab in
the New dialog box to create a new application project, or select
File>Open to open an existing application project.The Project painter workspace displays.
-
Specify or modify options as needed.
If you opened an existing project or a project created using
the wizard, the options already selected display in the workspace.
For information about each option, see Executable application project
options.When you have finished defining the project object, save the
object by selecting File>Save from the menu bar.PowerBuilder saves the project as an independent object in
the specified library. Like other objects, projects are displayed
in the System Tree and the Library painter.
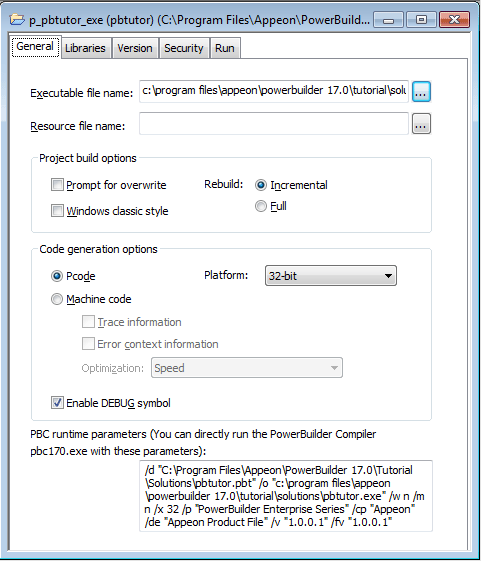
Executable application
project options
The following table describes each of the options you can
specify in the Project painter for executable applications. You can
also specify most of these options in the Application Project
wizard.
|
Option |
What you specify |
|---|---|
|
Executable file name |
Specify a name for the executable. The name must |
|
Resource file name |
(Optional) Specify a PowerBuilder resource file You For more about |
|
Prompt for overwrite |
Select this if you want PowerBuilder to prompt |
|
Windows classic style |
Select this to add a manifest file to the By default, this option NoteIf you have applied a theme to the application, you |
|
Rebuild |
Specify either Full or Incremental to indicate As a precaution, |
|
Platform |
Select if the executable can run on 32-bit or |
|
Machine Code |
Select this if you want to generate compiled code Selecting Machine |
|
Trace Information |
Select this if you want to create a trace file |
|
Error Context Information |
Select this if you want PowerBuilder to display |
|
Optimization |
Select an optimization level. You can build your |
|
Enable DEBUG symbol |
Select to enable any code that you placed in |
|
PBC runtime parameters |
Directly copy the runtime parameters which are For more information about PowerBuilder |
|
Libraries page |
The label for the PBD or DLL check box depends on If you Specify a resource file for a |
|
Version page |
Specify your own values for the Product Name, The Product and File version numeric The Product Version final value will The four numbers can be used to |
|
Security page |
Use the Security tab page to generate a manifest For |
|
Run page |
Specify command-line arguments, the application’s The Application field displays the name and |
Location of temporary
files
The machine code generation process puts temporary files in a
temporary directory, such as the TEMP directory. You can specify a
different location in the [PB] section of your PowerBuilder
initialization file with the CODEGENTEMP variable. You might want to
do this if you have limited space on your local system.
For example:
|
1 |
CODEGENTEMP=e:pbtempdir |