Creating public IP address
By default, an Nginx ingress controller is created with a new
public IP address assignment. This public IP address is only static
for the life-span of the ingress controller, and is lost if the
controller is deleted and re-created. A common configuration
requirement is to provide the Nginx ingress controller an existing
static public IP address. The static public IP address remains if the
ingress controller is deleted. This approach allows you to use
existing DNS records and network configurations in a consistent manner
throughout the life cycle of your applications.
There are several ways to create a static public IP address, as
described here.
In this tutorial, you will create a static public IP address using the
Azure portal.
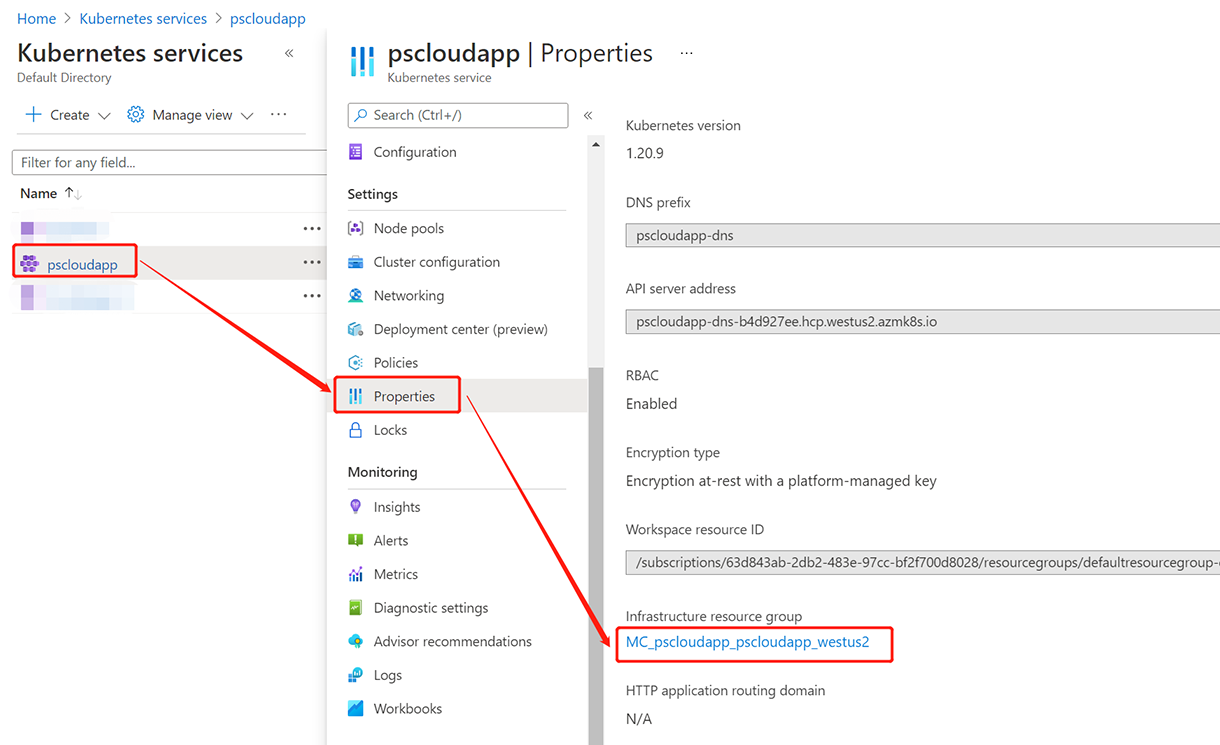
Step 1: Get the resource group name of the AKS cluster before
you create the static public IP address:
-
In the Azure portal, select the resource group.
-
Select the Properties
page. -
Make a note of the Infrastructure
resource group.For example, the infrastructure resource group for
pscloudapp is
MC_pscloudapp_pscloudapp_westus2.
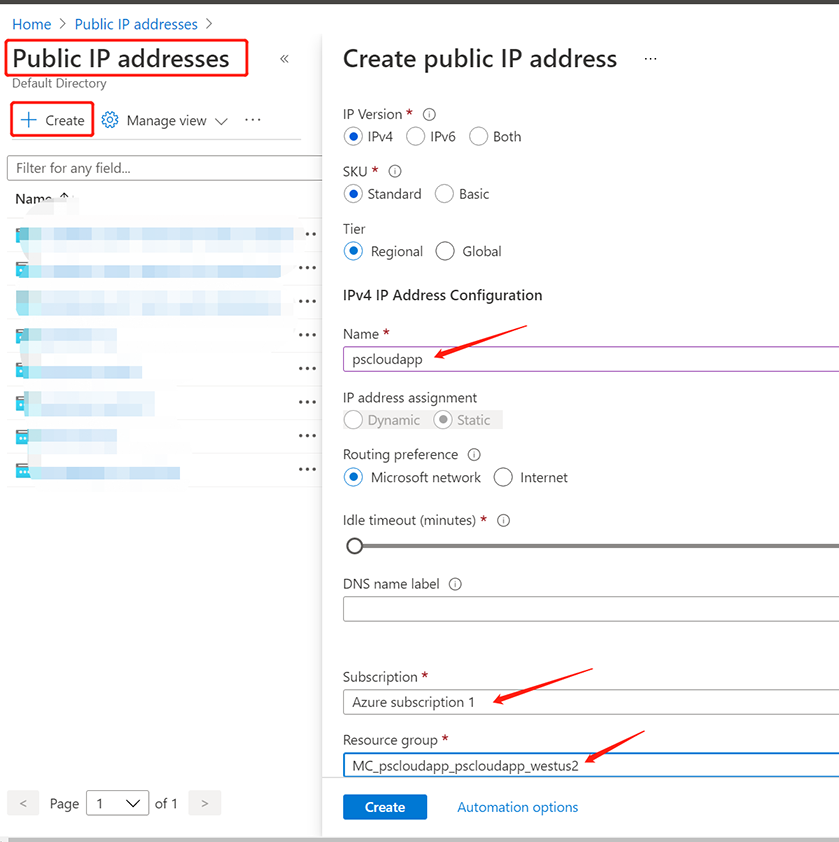
Step 2: Create a static public IP address.
The following example creates a static public IP address named
pscloudapp in the AKS cluster resource group
obtained in the previous step:
-
In the search box at the top of the portal, enter Public IP.
-
In the search results, select Public
IP addresses. -
Select + Create.
-
In Create public IP
address, enter, or select the following
information:Select Standard from
SKU.Enter a name for the IP address.
Select your subscription.
Select MC_pscloudapp_pscloudapp_westus2
from Resource group.Select the same location as the cluster.
Leave the others as default.
Finally, click Create.
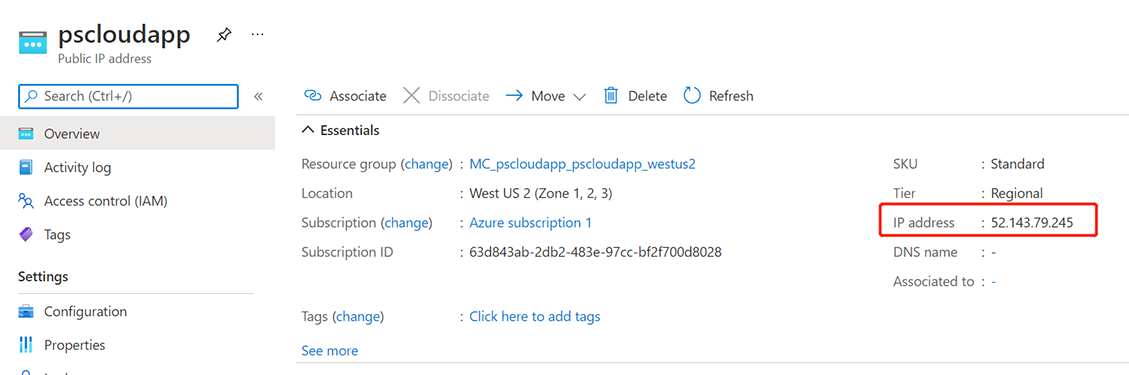
When the IP address is created successfully, make a note of the
IP address, for example, 52.143.79.245.
You will associate this static public IP address with the Nginx
ingress controller in the next section, and you may use it to access
the application later.