Creating a server profile for remote deployment
Step 1: In the PowerServer toolbar, click the Server Profile button.
Step 2: In the Server Profiles
window, click the New button.
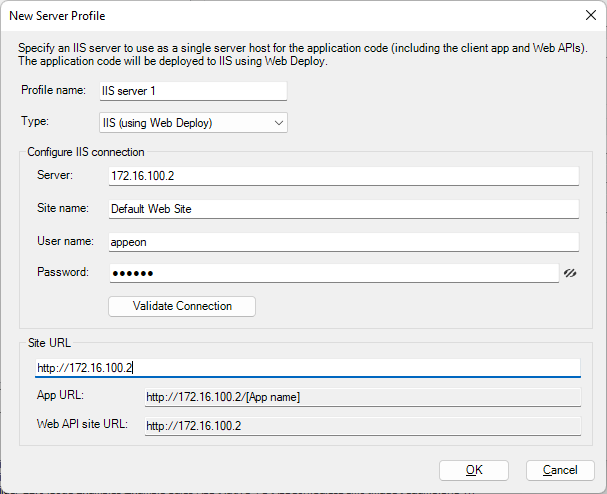
Step 3: In the New Server Profile
dialog, specify a name for the profile in the Profile name field, and then select IIS (using Web Deploy) from the Type list.
Step 4: In the Configure IIS
connection group, specify the following settings:
-
Server: the IP address or domain name of the IIS server
-
Site name: the name of the IIS web site
-
User name: the user name that has permissions to read and
write the specified site. The user can be a Windows user or IIS
manager. For more, refer to this
page. -
Password: the user password that has permissions to read and
write the specified site.
Step 5: Click Validate Connection
to make sure the connection is successful.
Step 6: In the Site URL field,
specify the URL of the IIS web site, for example,
https://172.16.100.2:80.
The site URL will be used to formulate the application URL and the Web API
URL (the client app will be deployed with the Web API by
default). If you have not specified the site URL, the Web API URL will be
http://localhost by default, and you can change this value in the client
app.