Create the Project object
Where you are
Now you create the PBTUTOR Project object. You can then use the
Project object to create the executable file for the application.
About machine code
When you deploy an application to users, you may want to take
advantage of the execution speed of machine code for some computations,
such as loops, floating point or integer arithmetic, and function calls.
While you are developing the application, you usually use Pcode because it
is faster to generate.
About dynamic libraries
You can also create dynamic libraries for your application. Dynamic
libraries can be used to store the objects in the application. By using
dynamic libraries, you can break the application into smaller units that
are easier to manage and also reduce the size of the executable
file.
For small applications like the one that you are working on now, you
do not need to use dynamic libraries.
-
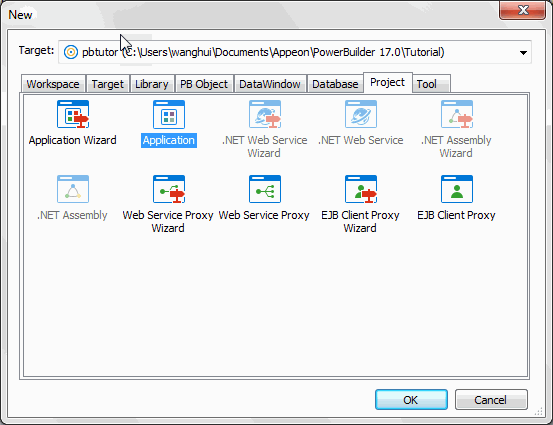
Click the New button in the PowerBar.
Click the Project tab in the New dialog box.
-
Select the Application Wizard icon and click OK.
Using the Project painter
If you clicked the Application icon on the Project page
instead of the Application Wizard icon, you open the Project
painter. You can make the same selections in the Project painter
that you make with the wizard, but the wizard prompts you for this
information. -
Click Next.
The Specify Destination Library page displays.
-
Select pbtutor.pbl in the Application Libraries list box if it
is not already selected.Click Next until the Specify Build Options page displays.
The wizard will generate a project with the following default
selections:Wizard property
Default value
Project name
p_pbtutor_exe
Executable filename
pbtutor.exe
Optional resource file
none
-
Select Incremental Build for the Build Option.
Click Next until the Specify Version Information page
displays.The wizard will generate a project with the following default
selections:Wizard property
Default value
Generate machine code
No
Build dynamic libraries
No
-
If you want to, enter your own version information on the
Specify Version Information page.If you do not change the information on this page, the defaults
display in Windows Explorer when you look at the properties of the
executable. -
Click Next.
Review the information on the Ready to Create Application
page. -
Click the Finish button.
PowerBuilder creates a Project object for your application and
displays it in the Project painter workspace.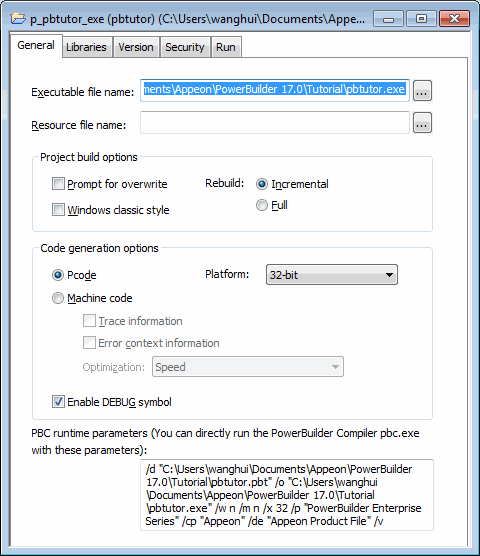
After a project is defined, you can easily create an executable
version of the application. Using a project saves time when you are
working on an application that includes dynamic libraries that you
expect to rebuild often. Selecting incremental build means that if you
make a few changes, you can rebuild your project quickly, rebuilding
only files that have changed or files that depend on files that have
changed.