Configure a server for deployment
You can deploy the PowerServer project directly from the
PowerBuilder IDE to the following servers:
-
local Kestrel server
For quick testing purpose, you can directly use a local Kestrel
server. A local Kestrel server is automatically created and run when
you deploy and run the PowerServer project within the IDE.For your convenience, the local Kestrel server is configured by
default. You can directly select to use the local Kestrel server as
the target server. -
local IIS server or remote IIS server
Ensure that you have installed the ASP.NET
Core hosting bundle on the server before continuing. For how to
set up a local IIS server, refer to Setting up the local IIS
server; for how to set up a remote IIS server, refer to Setting up a remote IIS
server.Then follow instructions below to create a server
profile.
To deploy to other environments such as Docker, Kubernetes etc., you
will need to install other tools (refer to Hosting Web APIs in Docker
Containers and Deploying
installable cloud apps to Kubernetes for more information).
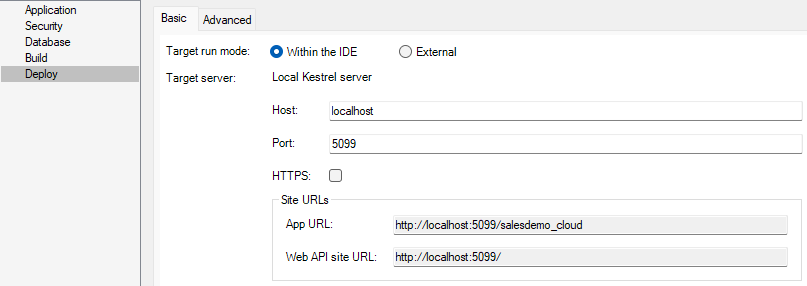
To modify the settings for the local Kestrel server:
-
In the PowerServer project painter, select Deploy > Basic tab.
-
Select Within the IDE run
mode.-
The local Kestrel server is configured by default. You can
directly use the default settings or modify the host name, port
number, and/or HTTP/HTTPS connection method for the local Kestrel
server. These settings will be used when the local Kestrel server
starts within the PowerBuilder IDE or in the Development hosting
environment. To change these settings, you can either 1) modify
the PowerServer C# Solution > ServerAPIs project > Properties > launchSettings.json
> “applicationUrl” setting; or
2) modify the settings here and then deploy the project
again. -
The App URL and the Web API site URL are automatically
generated based on the host name, port number, and connection
method.
-
To create a server profile for
IIS:
-
Click the Server Profile button
on the PowerServer Toolkit toolbar. -
In the Server Profiles window,
click the New button to create a new
server profile (you can also select an existing server profile on the
left and then modify the settings on the right, or delete the server
profile)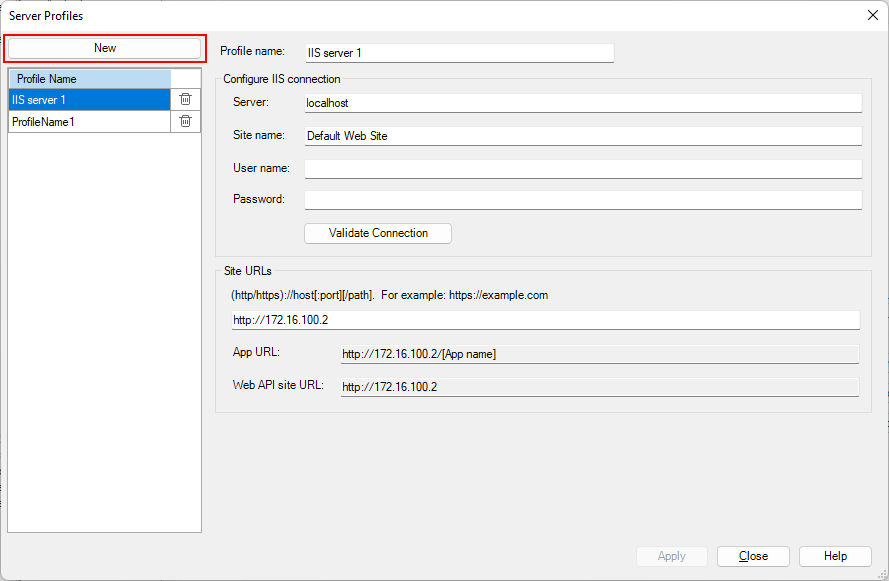
-
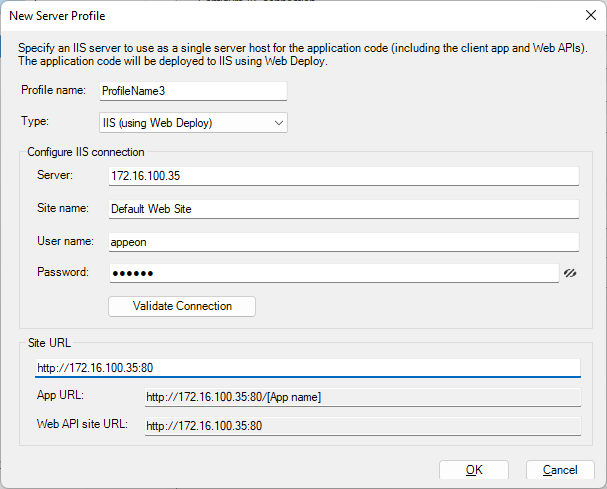
In the New Server Profile window, create the profile
with the following settings.-
Modify the profile name as needed.
-
Select IIS (using Web
Deploy) from the Type
list. -
Configure the IIS connection.
Server: The IP address or
machine name of the IIS server. The port is by default 8172. If
you have changed the port, specify the port here.Site name: The IIS web site
where files will be deployed.User name: The user name
that has permissions to read and write the specified site. The
user can be a Windows user or IIS manager. For more, refer to
this
page.Password: The user password
that has permissions to read and write the specified site.To connect with a local IIS server, if the current Windows
user has permissions to read and write the site location, you can
leave User name and Password blank.Click Validate Connection
to make sure the connection is successful.Note
If you intend to deploy to the local IIS server, make sure
you run PowerBuilder as administrator or have read and write
permissions to the site location (read and write permissions are
required when transferring files to the local server). -
Specify the site URL. If you want to run the application
from the Run Project button, you
will need to specify the site URL, and make sure the URL points to
the IIS website where files will be deployed, for example,
http://172.16.100.35:80.The site URL will be used to formulate the application URL
and the Web API URL automatically (the client app will be deployed
with the Web API by default).If you have not specified the site URL, you will have to
formulate the application URL manually (view more); and the Web API URL will
be set to http://localhost by default (you can change this value
later in the client app
> apprun.json file). -
Click OK.
The server profile will be created and listed in the
Server Profiles window.
-