Add a workspace to SVN
You can add a PowerBuilder workspace to the SVN source control
system from the PowerBuilder IDE. Make sure all of your source code
for the workspace is located under the same directory as the workspace
(*.pbw) file or under its sub-directory.
To add a PowerBuilder workspace to the SVN source control
system:
-
Right-click the workspace in the System Tree and select
Add to Source Control from the
pop-up menu. -
In the Add to Source
Control dialog box, select Subversion (SVN) as the source control
provider for the current workspace and click OK.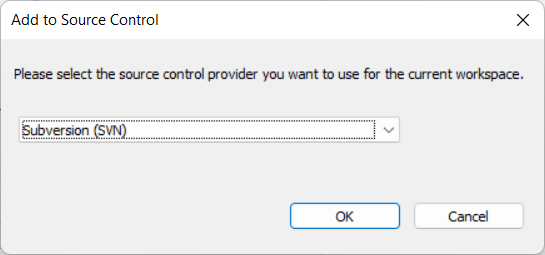
-
In the SVN Login dialog
box, input the information required by the source control system.
If the login information has been input before, they will be
filled in automatically.In the Repository URL box,
input the URL of the SVN source control repository. The name of
the current workspace is automatically displayed and a folder will
be created with this name for storing this workspace on the
server. Notice that the URL for the workspace will be the server
repository URL + the workspace folder name. Use this complete URL
when downloading the workspace. Connecting to a local repository
of SVN using the file:// protocol (such as
file:///C:/SVNRepository) is unsupported.Select an authentication type. Token is not supported for
SVN currently.Type in your user name and password for the SVN source
control system.Click Connect to make sure
connection is successful and then click OK.Specify the encoding format for the source code files in
“ws_objects”. You can select from: ANSI/DBCS, HEXASCII, and UTF8.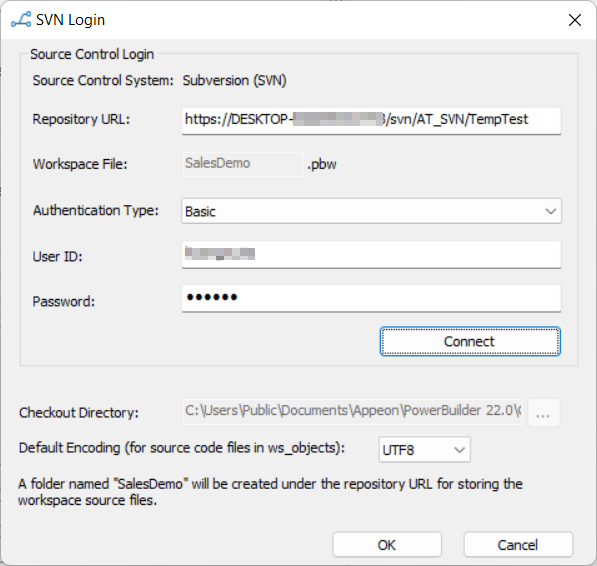
After connecting with the source control system
successfully, the Add to Source
Control dialog box displays listing all the files for
the workspace that are not currently under source control. You
cannot add files that are already under source control.You may notice that a “ws_objects” folder is automatically
created under the workspace. This folder is for managing the
source code file of the PowerBuilder objects including .srw (for
window), .srm (for menu), .sru (for user object), .srd (for
DataWindow), etc. It must be added to source code, in order to
manage the source code at object level.All of the source code for the workspace must be located
under the same directory as the workspace (*.pbw) file or under
its sub-directory.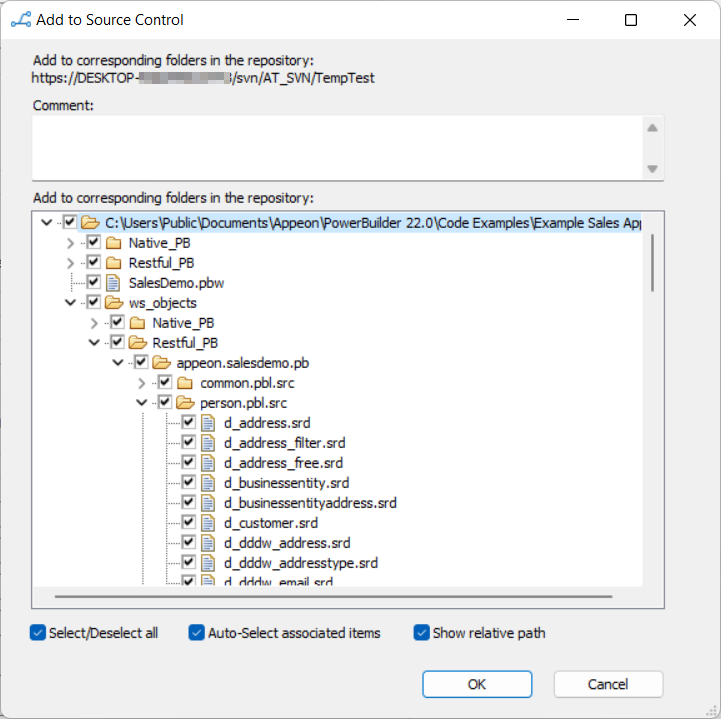
-
In the Add to Source
Control dialog box, select the files and folders
(especially “ws_objects”) and click OK.PowerBuilder starts uploading the selected files and folders
to the source control system. After the file or folder is added to
source control, the object in the PowerBuilder System Tree will be
marked with a green dot ( ) in front of it, indicating that its source
code file on the local computer is in sync with the file on the
server.Note
If using the proxy server, configure the proxy server IP
address and port number in the PB.ini file. See Using proxy server for
more information.