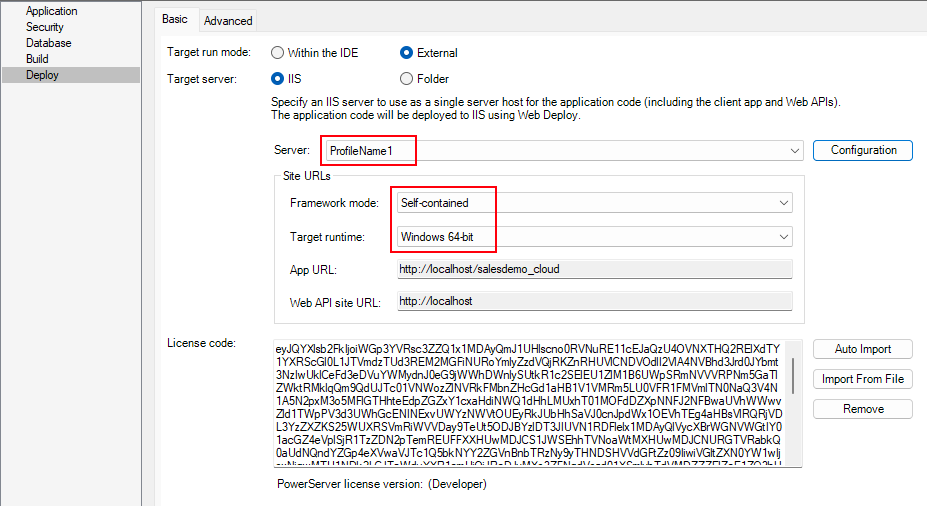
Configuring the server profile
Step 1: In the PowerServer project painter, select the Deploy page > Basic tab.
Step 2: Select External as the
target run mode, select IIS as the
target server, and then click the Configuration button.

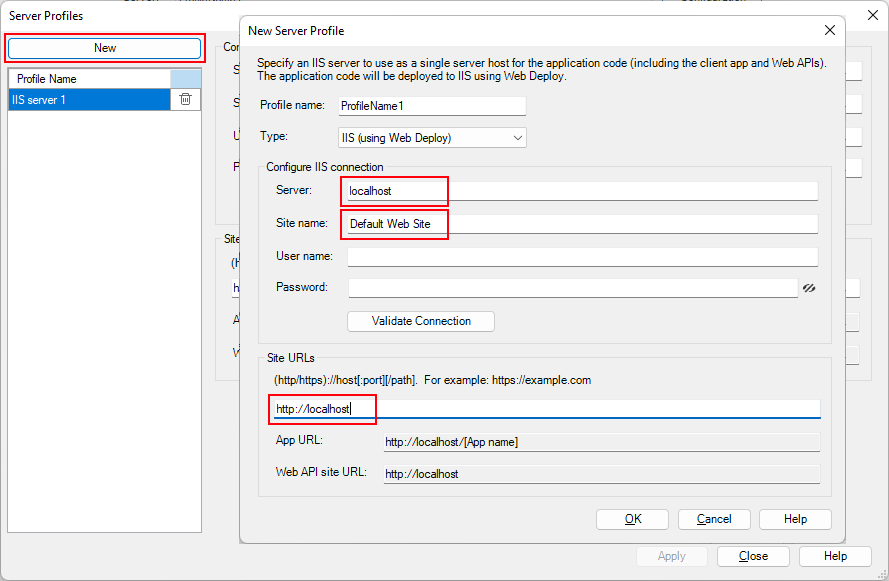
Step 3: In the Server Profiles
window, click the New button.
Step 4: In the New Server
Profile dialog, specify a name for the profile in the
Profile Name field, and then select
IIS (using Web Deploy) from the
Type list.
Step 5: In the Configure IIS
connection group, specify the following settings:
-
Server: the IP address or
domain name of the IIS server. You can also input “localhost” when
deploying to the local IIS server. -
Site name: the name of the
IIS web site where files will be deployed. -
User name: the user name
that has permissions to read and write the specified site. It can
be a Windows user or IIS manager. -
Password: the user password
that has permissions to read and write the specified site.To connect with a local IIS server, if the current Windows
user has permissions to read and write the site location, you can
leave User name and Password blank.
Step 6: Click Validate
Connection to make sure the connection is
successful.
Step 7: In the Site URL field,
specify the URL of the IIS web site where files will be deployed, for
example, https://[ip]:[port].
The site URL can be used to formulate the application URL and
the Web API URL (the client app will be deployed with the Web API by
default).
Step 8: Return to the Deploy
page > Basic tab, and make sure
the server profile you created just now is selected from the Server list.
Step 9: Make sure the framework mode and the target runtime are
appropriate for your environment.