Deploying the PowerServer project
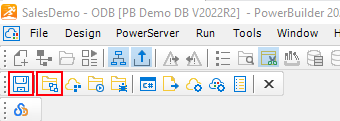
Step 1: Click the Save button
( ) in the toolbar.
Step 2: Click the Build & Deploy
Project button ( ) in the toolbar to build and deploy the
project.
Step 3: Make sure the deployment is successful.
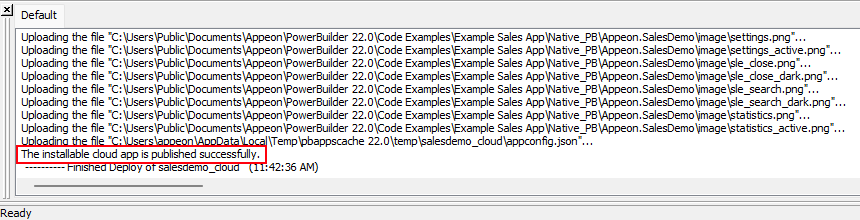
If you encounter any errors during the deployment process, check
the Troubleshooting Guide
for solutions.
When the process is completed, the PowerServer C# solution will
be generated under the specified location.
The PowerServer C# solution is an ASP.NET Core solution which
contains the following project folders:
-
The AppModels project
folder contains the C# models and the embedded SQLs. -
The ServerAPIs.Tests
project folder contains test cases which can check if the
PowerServer Web APIs is running correctly. -
The UserExtensions project
folder contains miscellaneous tools such as logging,
authentication, management APIs etc. -
The ServerAPIs project
folder contains 1) the project files for PowerServer Web APIs and
2) a “wwwroot” sub-folder which
contains the static files for the cloud app launcher, runtime
files and the application files. PowerBuilder IDE can
automatically compile and run the ServerAPIs project when you click the
Run Project button. You can also
manually compile and run the ServerAPIs project in a C# editor such as
SnapDevelop.