Adding simultaneous users
“Simultaneous users” are users making the same requests exactly
at the same point of time.
In JMeter, you can use Synchronizing
Timer to simulate users making requests simultaneously. The
purpose of Synchronizing Timer is to
hold the threads until X number of threads have arrived and then
release them all at once.
This section will walk you through how to add a Synchronizing Timer and verify the
results.
Step 1: Suppose you have created a test plan for the Sales Demo
application and you have correlated the session ID and the transaction
ID.
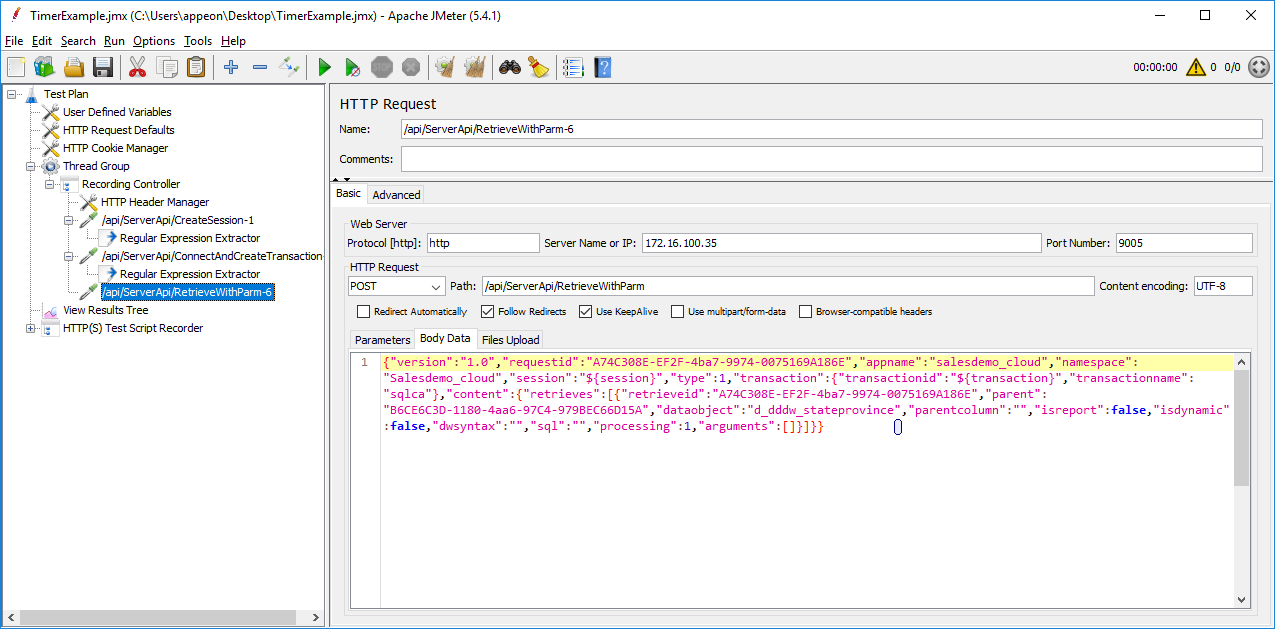
Note that the session ID and the transaction ID must be
referenced as variables (which are local to the thread group), and
cannot be referenced as properties (which are global to all thread
groups). Therefore you should not add the BeanShell Sampler or
BeanShell PostProcessor to set the variable as a property, or add
other thread groups such as setUp Thread Group or tearDown Thread
Group.
For example, you should directly input ${session}
or ${transaction} in the scripts, instead of referencing
${__property(session,,)} or
${__property(transaction,,)}.
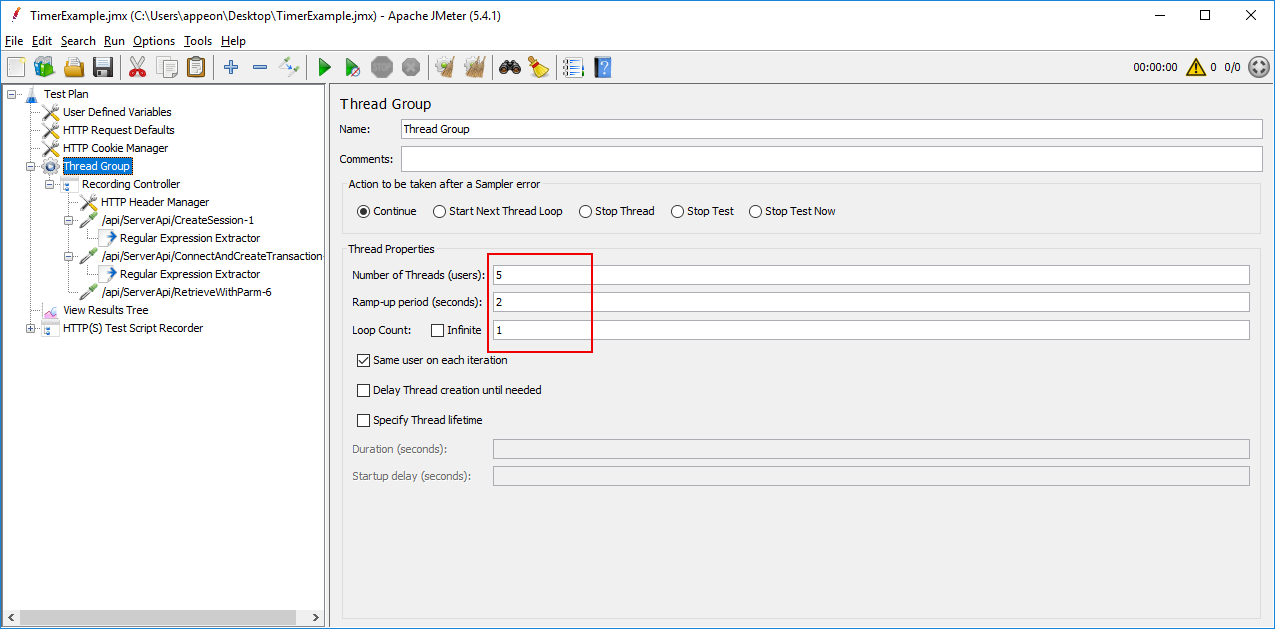
Step 2: Configure the thread group according to your
needs.
For example, set the number of users to 5, ramp-up period to 2
seconds, and loop count to 1.
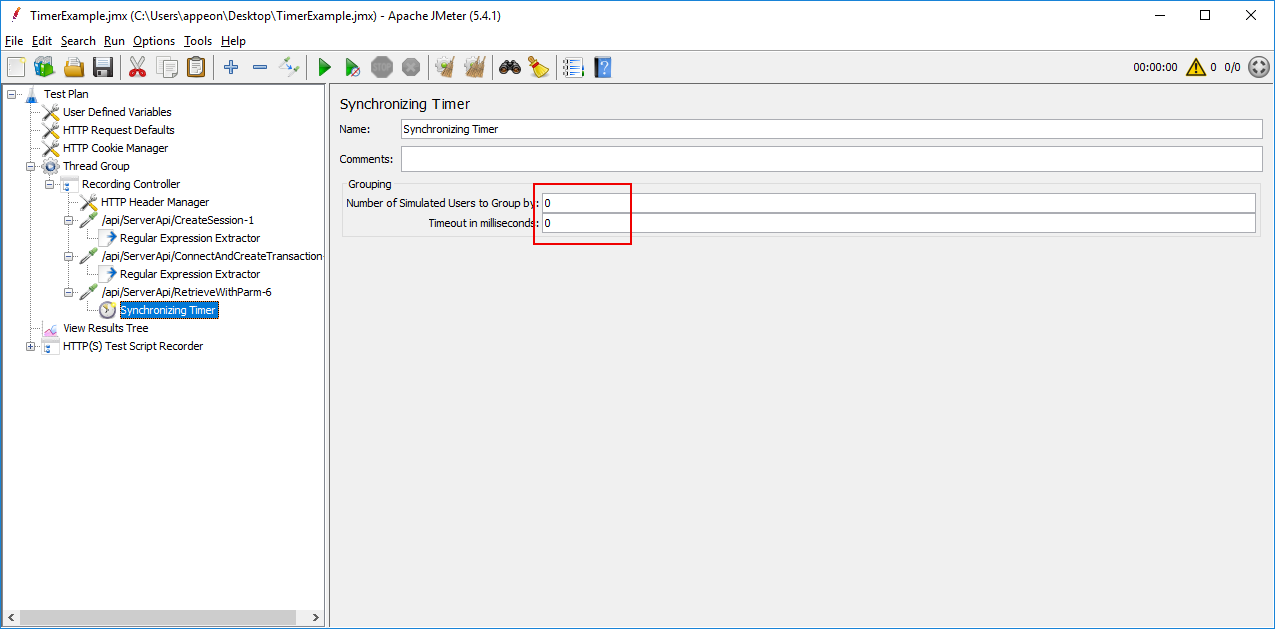
Step 3: Add a Synchronizing
Timer under the RetrieveWithParm request.
To add a Synchronizing Timer,
right click on the RetrieveWithParm
request, and then select Add >
Timer > Synchronizing Timer.
Keep the default values. This indicates that JMeter will release
the same number of users defined in the thread group (which is 5 in
this demo).
Step 4: Add a View Results in
Table listener under the test plan.
To add a View Results in Table
listener, right click on the test plan, and then select Add > Listener > View
Results in Table.
This listener can display the information of the request in the
form of a table, and in the order of time each request is made.
Step 5: Click Start on the
toolbar to run the test.
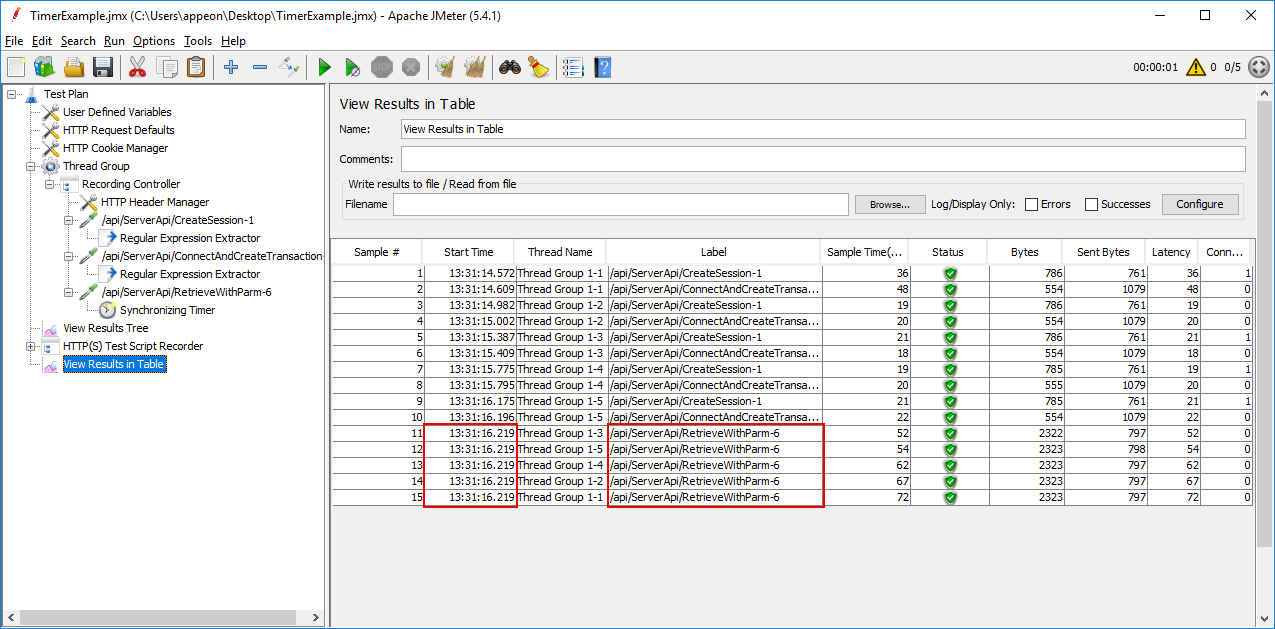
Step 6: Click View Results in
Table to verify that all RetrieveWithParm requests are made exactly at
the same point of time.
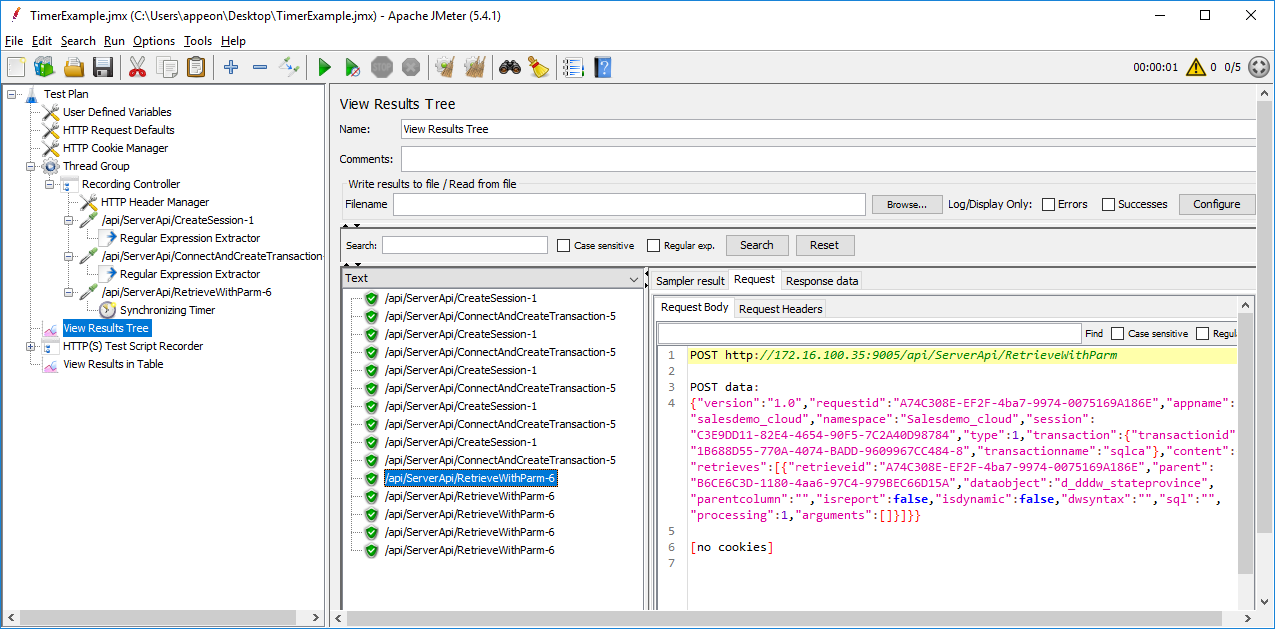
Step 7: Click View Results Tree
to verify that the session ID and the transaction ID are dynamic
values in the request body or response data.